How I Prepared for a Hakuna Matata Summer Play Date!
Facetune_04-08-2019-21-55-49.JPG

#NowMoreThanEver

This is a sponsored post. All opinions are my own.

Friends, having a busy lifestyle with a demanding full-time job, two active boys and a few side hustles means I rarely get time to plan things calmly and with plenty of time in advance anymore. Parties, events and festivities I host are usually whirlwind last-minute productions… but I have amazing friends and family that always show up no matter what! (Special shout-out to my cousins, mommy tribe and bestie!)

I share this because I recently partnered with Disney and threw a #NowMoreThanEver Summer Disney Play date for Benny and Toby and their friends and cousins. Organizing this party for 50+ guests meant a lot of planning in a short period of time. With so much to do, I had the boys visit their grandma for a night which allowed to me get home from work and focus on planning, planning, planning!

The party theme and details were already set since I received a box with instructions and a generous array of Lion-King themed party decorations, games & favors.

IMG_1980 2.JPG

First thing’s first…

I knew that if I’d be spending quiet time alone for party planning— I would not be cooking that night. So, I popped a Michael Angelo’s Veggie Lasagna meal into the microwave for a few minutes and poured myself a glass of California Rosé… cause a girl’s gotta relax!

Look, I know the lasagna is after all, a frozen meal… BUT… Michael Angelo’s products are actually made with wholesome, simple ingredients… It’s frozen food for people who don’t like frozen food.

But I digress.

To begin the party prep, I started moving forward with the bigger tasks first— upon receiving all of the RSVPs, I booked table & chair rentals to seat my guests. Then I contacted my dad who used to own a catering business about possibly helping us cater the play date. He agreed.

IMG_2070.jpg

Next was figuring out party fun for the kids—

The challenge was finding a way to keep them entertained while the adults could do some adultin’. Since we don’t have a pool at home, I thought renting some water games would be ideal. I booked a local company who delivers pump and splash games for kids and it turned out to be a great idea!

IMG_2069.JPG

Once the big things were booked,

I started working on details.

IMG_1981 2.JPG
Ice Cream Labels.png

In my opinion, details really matter to make a party stand out— this entails having a vision of how you want the event to flow and how you want stuff organized, from framing signs, labeling everything with custom designs that match the party theme and making things easy for guests to navigate. I started by copying my invitation design to create “Thank you” messages for the goody bags. Next, I created labels for the toppings on the ice cream sundae bar. I also made signs for everything— recyclables, trash, suncreen, drinks and lunch menu by using an online design app called PicMonkey.

Facetune_04-08-2019-10-44-35.jpg

Finally, I gathered everything that had arrived from Disney

And did an inventory of things I was still missing. From there, I went to the dollar store to pick up a few small items including vases to fill with faux tropical leaves to serve as centerpieces. I didn’t want to incorporate balloons because the heat would probably make them deflate or pop. Nor did I want to add too many streamers across the garden because those usually end up staying in place for months thereafter! But I did include a few other details I thought would be appropriate for the jungle, the mighty jungle…LOL!

IMG_2071.JPG

Friends, the Hakuna Matata Summer Play Date

turned out to be a fun summer party!

Read all about our #NowMoreThanEver Play date here!

My friends and family joined in. There were nearly 30 kids and everybody enjoyed their time. I am grateful for the opportunity to work with Disney. I encourage you all to consider making magical memories #NowMoreThanEver

Thanks for reading!

Xo,

-Anabel M.

Anabel Marquez
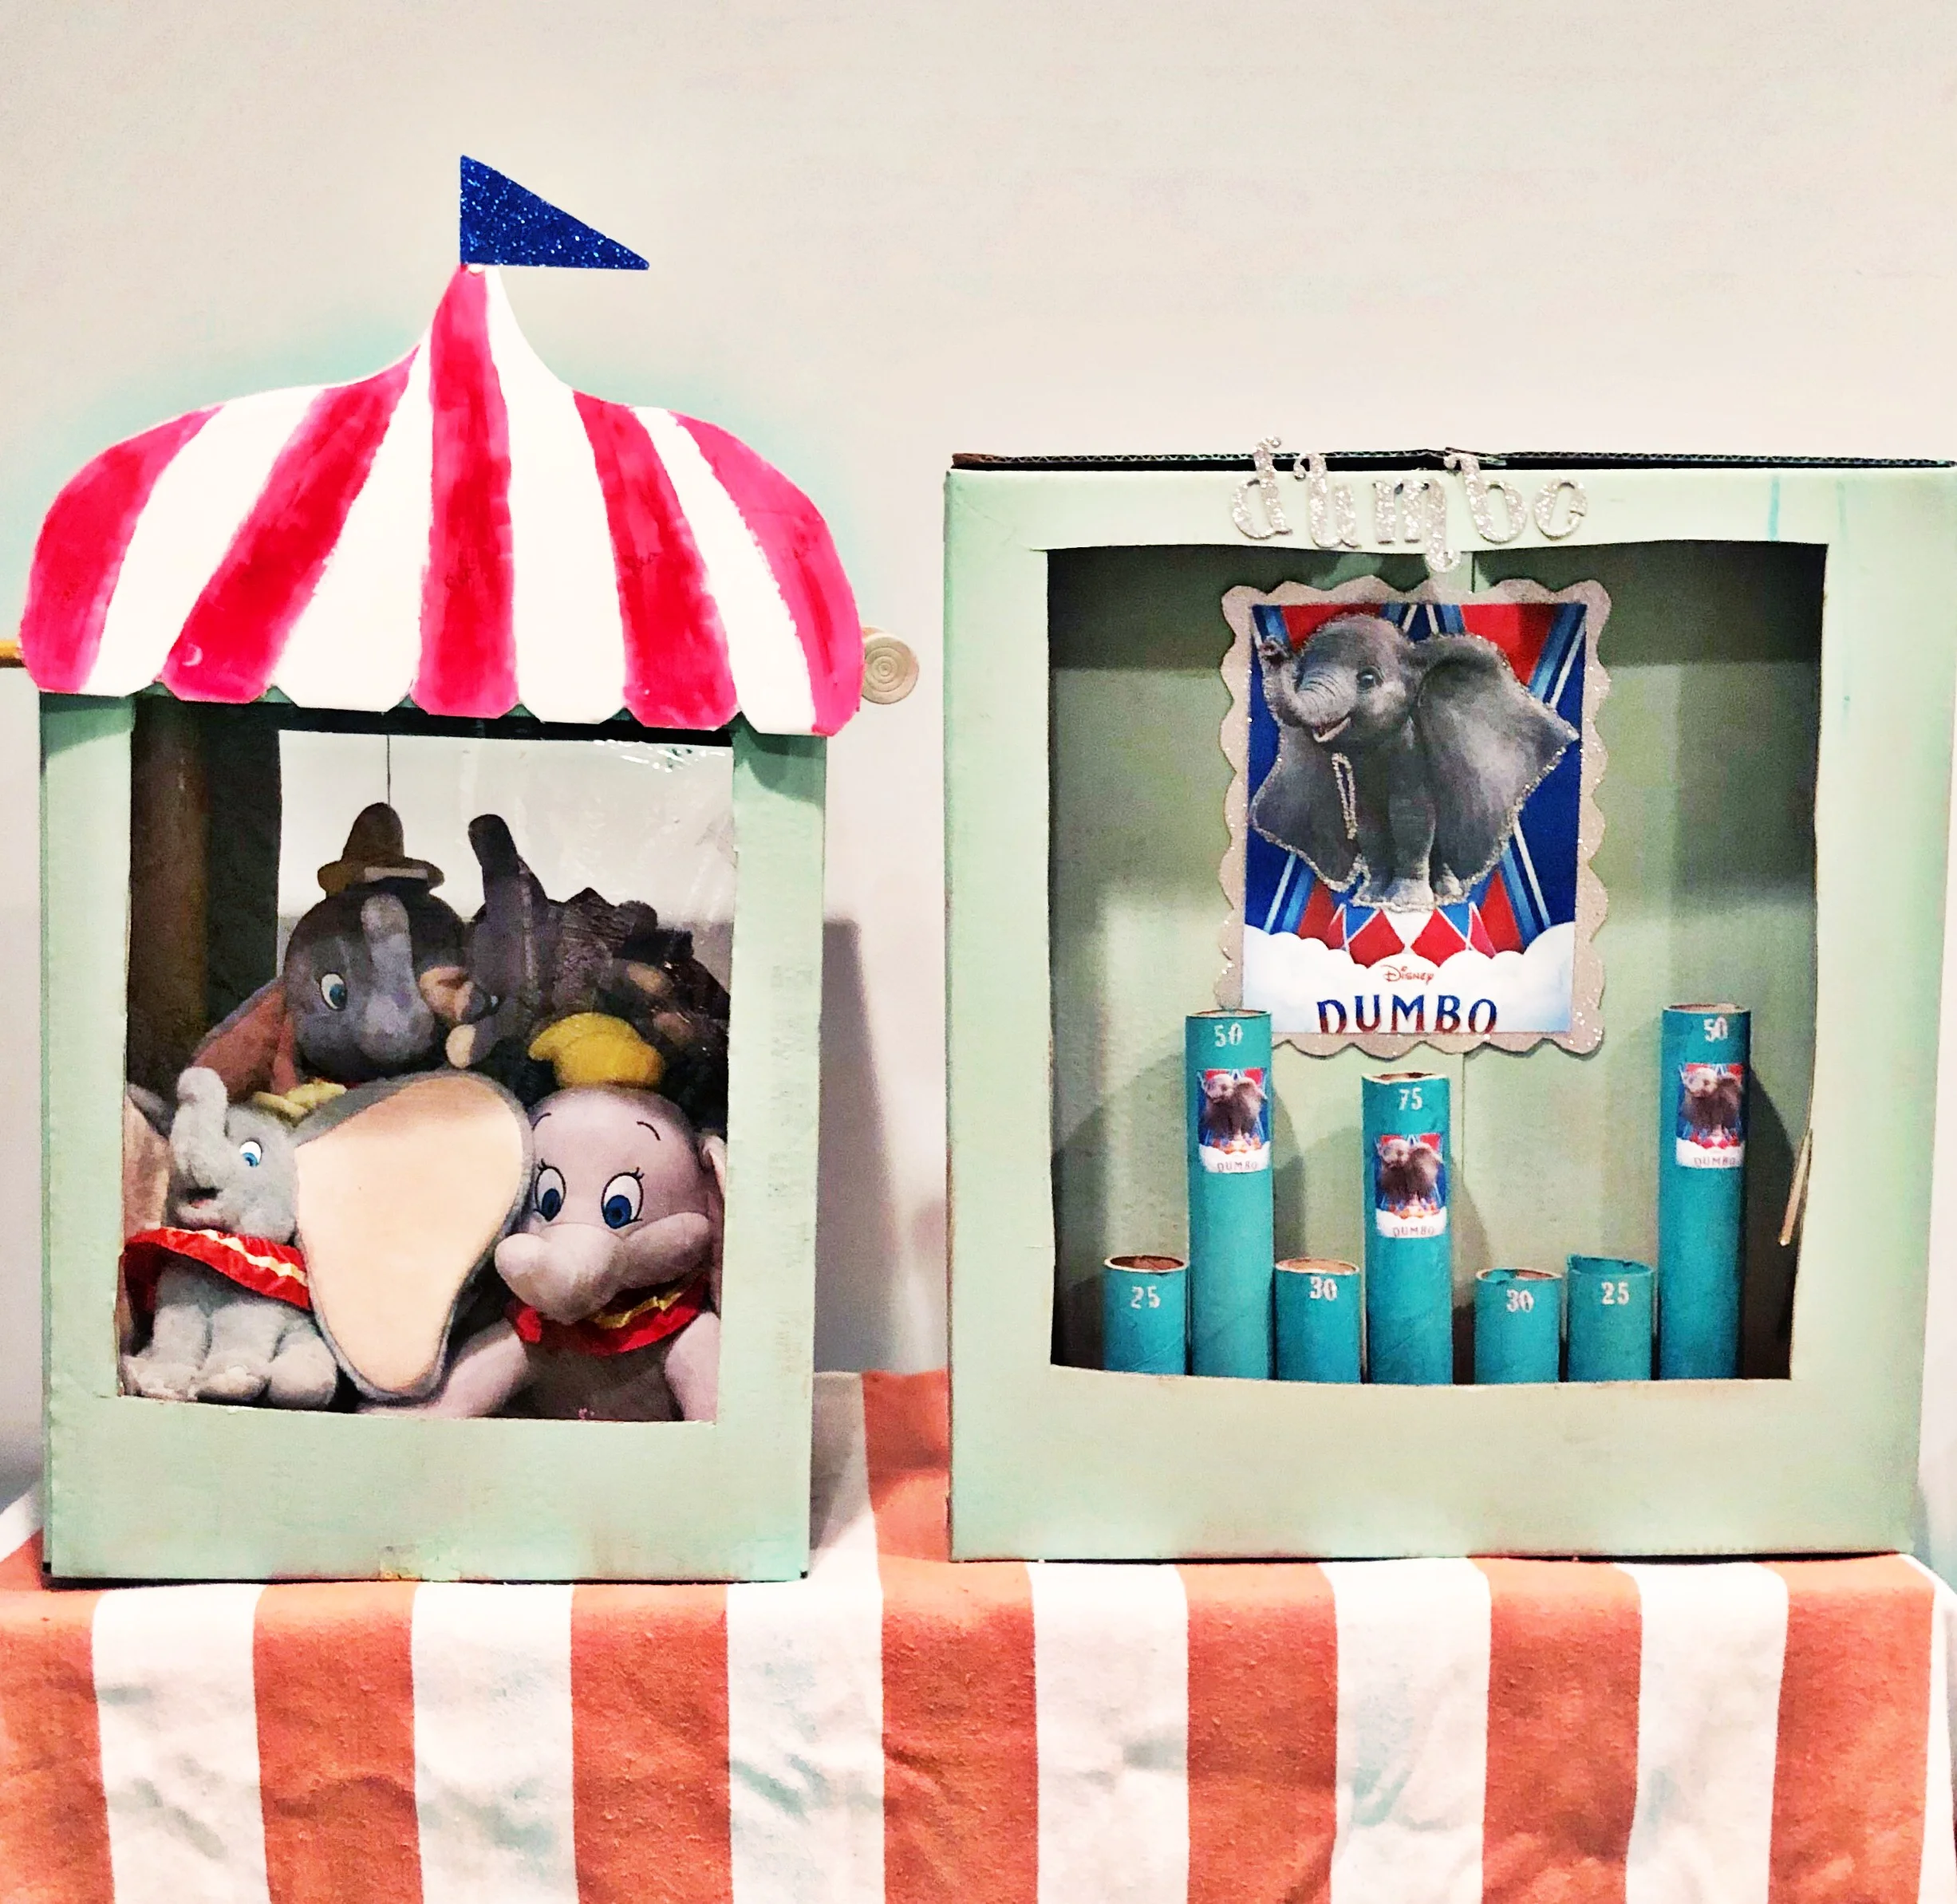
DIY 'Dumbo' Inspired Carnival Arcade Games
IMG_6803 2.JPG

DIY Dumbo Fun

What happens when you can’t agree with your boys on whether Friday night should be a Dumbo-Movie night or an arcade outing?

You stay home!

IMG_8240.JPG

Not too long ago,

we were all happy to see another week conclude. The kids wanted to go to Dave & Busters. I wanted to watch Tim Burton’s Dumbo. Neither group was budging so I made the executive decision to stay home, where we actually made Dumbo-themed arcade games and had the best family night ever!

IMG_8066.jpg
IMG_8076 2.JPG

Benny and Toby enjoyed following instructions

as I guided them through painting cardboard tubes, applying stickers, organizing toys inside a cardboard box, creating values for certain ball drop results and setting up rules to take turns.

If none of this makes sense, it’s okay— here’s what we did

A Dumbo-themed Ball Drop arcade game:

IMG_8235 2.jpg

We also created a Claw grabber-type game

where all prizes were set-up to be Dumbo plushies or other pachiderm themed toys…hehe. This project was done by basically cutting out the front of a box and covering with clear wrap. Then I carved two holes (one on each side of the box) and inserted a wooden dowling through the holes. This serves as a manual claw grabber that you can twist. You would tie a string with a velcro piece at the end and turn it in order to release the string low enough for the velcro to stick onto a plushy and then high enough to claim the prize…Ta-da!

IMG_8237.jpg

I’m not sure that our evening would have been as memorable

chasing boys around a dark arcade full of people or inside a quiet theater trying to keep Toby from getting bored while eating pounds of buttery popcorn. What I do know is that these little guys are pretty crafty and I was happy to stay home and watch them work.

Thanks for reading, friends!

Xo,

-Anabel M.

Anabel Marquez
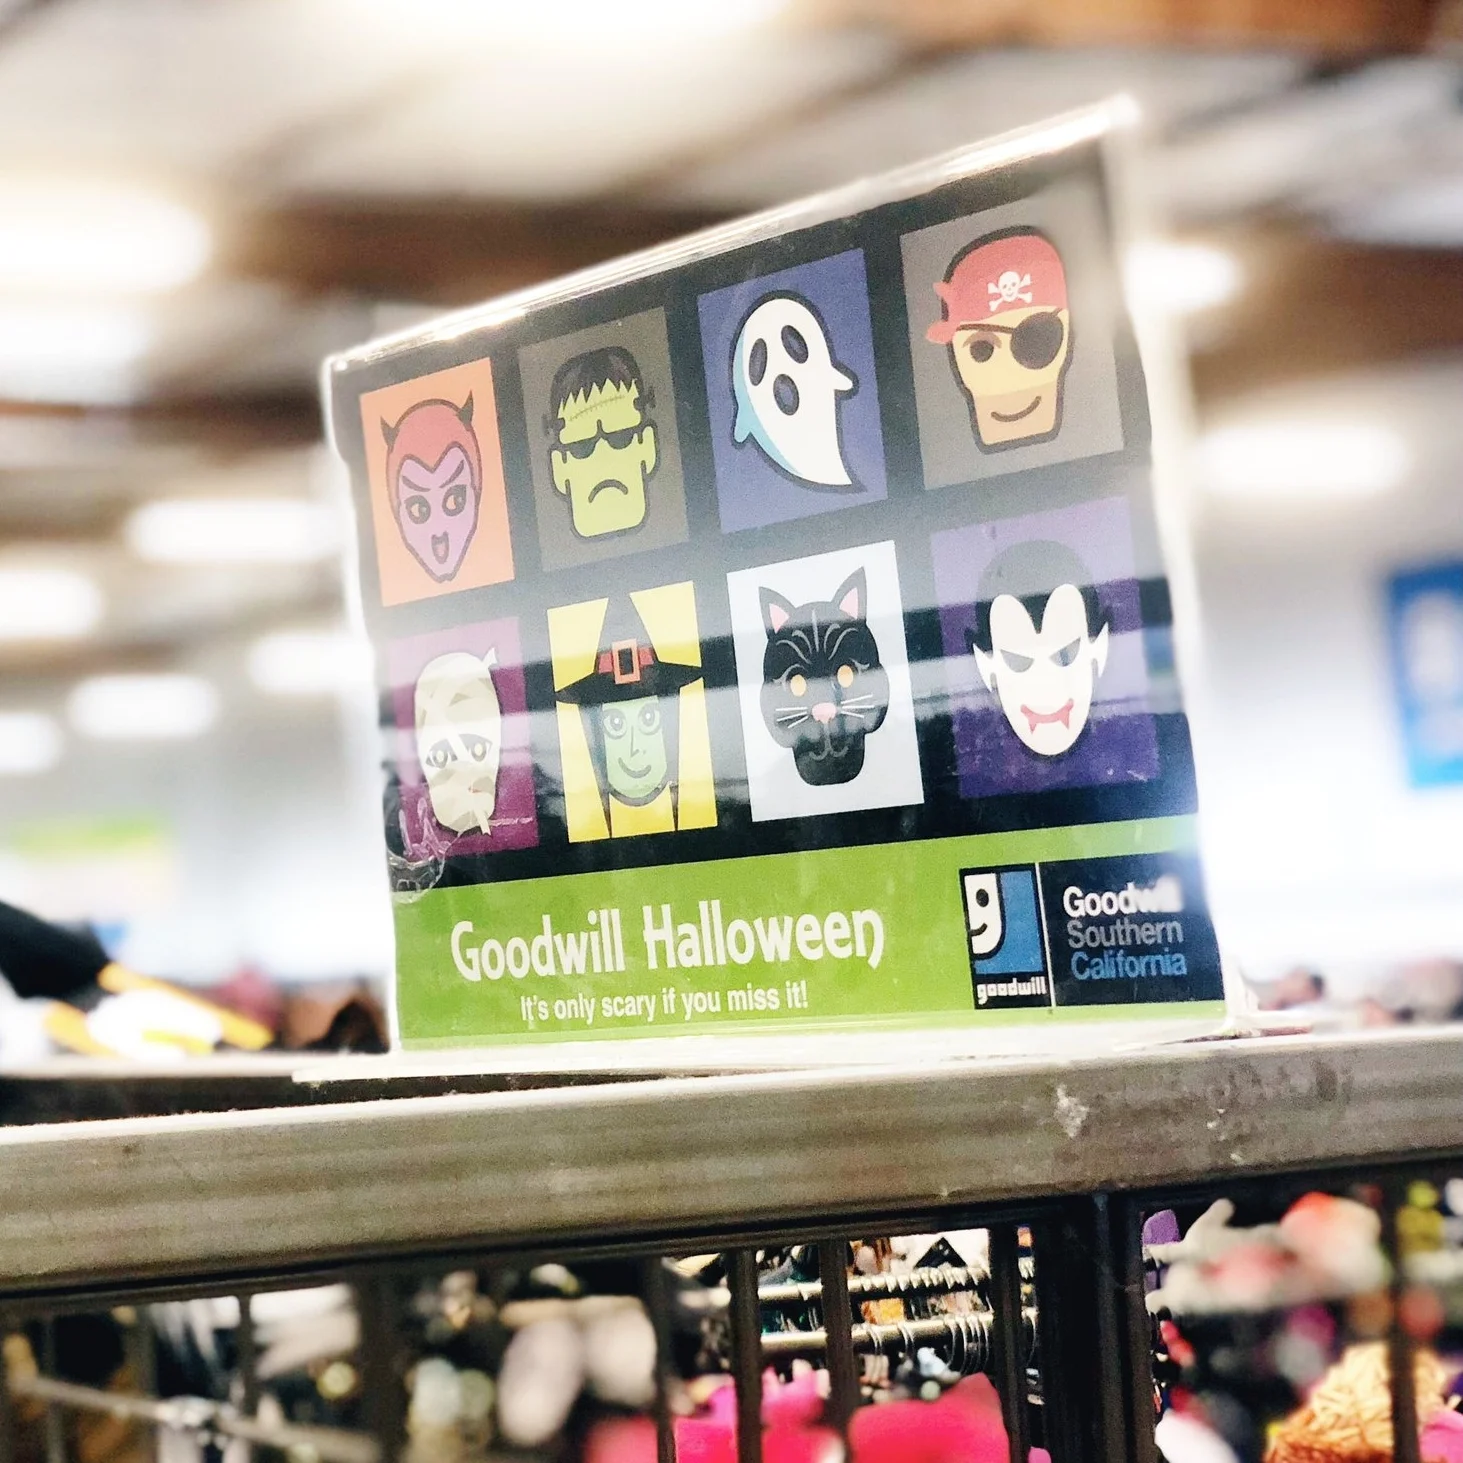
Goodwill of Southern California is THE Halloween Headquarters!

Goodwill’s Halloween BOO-Tique Has it All!

IMG_6622.JPG

#31DaysofHalloween

Friends, there’s only a month left before Halloween!

Did you know Halloween retail spending exceeded $9 billion last year?

According to the National Retail Federation, an average of $86 was spent per person in 2017.

The most expensive part of Halloween? The costumes.

I contemplated a Joker costume while visiting Goodwill Southern California Halloween Boo-tique at Fletcher Square.

I contemplated a Joker costume while visiting Goodwill Southern California Halloween Boo-tique at Fletcher Square.

This year, I partnered with Goodwill Southern California

because I’m trying to encourage a more practical lifestyle.

Instead of spending an average of $340 for our family costumes, why not save some of that money and apply it toward a more meaningful cause? Plus, why buy more new stuff when we can get creative with pre-used items, then donate those again for someone else to use, don’t cha’ think? Lastly, Goodwill Southern California is a tax-exempt organization whose mission is to Transform Lives Through the Power of Work.

They serve individuals with disabilities and disadvantages by providing education, training, work experience and job placement services. Every purchase made is applied toward that mission.

IMG_6624.JPG

I visited the Goodwill Store at Fletcher Square

(in Atwater Village) and left home with absolutely everything needed to create unique, one-of-a-kind costumes for the entire family at a fraction of the cost!

I’ll start by sharing that many Goodwill Southern California locations have dedicated entire store areas to their Halloween BOO-Tique displays.

This means that an entire section of racks featuring costumes and other clothing items such as dresses, shirts, jackets and accessories are placed in a single area to give customers instantaneous Halloween costume ideas.

IMG_6620.JPG

There are also

new items available for purchase. like masks, a variety of hats and other Halloween costume “extras” to accessorize a unique look:

IMG_6619.JPG

After spending some time

looking through many fun pieces and envisioning a good family Halloween theme… I started narrowing down our options. This year, I wanted to pay homage to my Mexican roots by dressing up as the iconic “Raton Vaquero” or Cowboy Mouse, that was brought to life in a children’s song by the famous Mexican composer, Gabilondo Soler.

I found everything I needed at Goodwill Southern California to bring my idea to life!

IMG_6623.JPG

When I checked out,

I was surprised and very proud that the total for our costumes, including accessories, vests, hats and other fun props came out to less than $75…

That’s less than $20 per costume!

IMG_6621.JPG

I can’t wait to share our Halloween costumes!

I encourage you to visit a Goodwill Southern California store (there’s approximately eighty in Los Angeles County— use the Goodwill Locator here to find the store nearest you) and share your own creative costume ideas.

Thanks for reading, friends!

Xo,

-Anabel M.

This is a sponsored partnership with Goodwill Southern California. All opinions are my own.

Giant Valentine's Day Box of Chocolates

Cake-sized Chocolate!

VD1.jpg

A fun way of delivering Valentine's Day cake treats!


Every year I try to recreate something that is representative and iconic of Valentine's Day. I do it because it's fun and my boys love it when I surprise them with treats.
Last year, for example, I made Conversation Heart Cheesecakes!
This year, I created a giant construction paper heart box to look like the ever-so popular heart-shaped chocolate boxes that we've all received.
I think it's a fun way of presenting cupcakes on Valentine's Day to relatives, co-workers or  classmates.
For this project, I used one box of chocolate cake mix and baked the batter using an assortment of cake and cupcake pans. It yielded about 20 individual cakes.
Here's how I made the giant chocolate box:

VD2.jpg

MATERIALS:

2 Large white cardboard project sheets (cut into large hearts) | Scissors | Gold Foil Gift Wrap/Tissue Paper | Clear pink or red cellophane wrap | Glue | Gold Ribbon | Red Glitter Paper

VD3.jpg

I started by covering one of the hearts with red foam glitter sheets. The sheets have adhesive on the back which made it easy to stick and cut around the edges. | I covered another large cardboard heart with the gold foil (which will serve as the base for the chocolate cakes)

Next I wrapped the heart covered in red glitter foam with the pink cellophane wrap. Once this step was complete, I wrapped a gold bow around this piece.

When the cakes were ready, I decorated some of them with chocolate frosting and others with white vanilla frosting. I also used chopped peanuts and all the different designs gave it a "chocolate variety" look.

VD4.jpg

As you can see, I cut part of the cake into squares, hearts and rectangles

I placed the cakes over the gold foil covered heart and arranged them neatly. Then I glued a strip of white construction paper on the edge of the heart to give it the appearance of a real box of chocolates.

Moments before the big reveal:

VD5.jpg

I must say, having kids brings a whole new meaning to Valentine's Day for me. I'm not sure if my hubby and I will have a date night on Valentine's Day. What I do know is that I already had my dose of chocolate for the month!

VD6.jpg

I hope you enjoyed and I look forward to seeing your Valentine's Day Projects and ideas!

Xo,

-Anabel M.

Anabel Marquez
Zebra Head Christmas Tree Topper Tutorial

Merry Christmazebra!

Zebra1.JPG

A Wild & Fun Zebra Tree Topper


For our "Wild and Fabulous" zebra-themed Christmas, I thought it would be appropriate to make a zebra head Christmas Tree topper.
The project went on a little longer than I intended but it finally got done tonight.
It's all just a matter of gathering all the materials and having lotsa' patience, especially if you have kids who want to be involved but don't quite have a grasp on crafting projects that are a bit more complicated than preschool crafts (hehe).

MATERIALS:

1. Newspaper
2. Masking Tape
3. An old book
4, Modge Podge
5. Paint brushes
6. Sponge brushes
7. Paper towels
8. cardboard
9. Scissors
10. Black paint
11. Flour
12. Water

Zebra2.JPG

1. This is how I started my project: Just newspaper and masking tape. I made two balls out of newspaper (one slightly smaller than the other one, which would become the zebra's muzzle)

2. Once you have the shape of the head with the newspaper balls connected with masking tape, you can mold the paper with your fingers so it takes on the desired shape.

3. For this project, I made a pot full of homemade paste. In Spanish it's called "engrudo". I boiled three cups of water and added a cup of flour to the boiling water and three tablespoons of sugar and mixed the ingredients until it reached a creamy consistency.

4. This is what it looked like when it was done. It lasts up to a week before mold starts growing out of it, so make sure you time your projects accordingly:

Zebra5.JPG

5. I cut pieces of paper towels and dipped them in the homemade paste and basically started covering the newspaper zebra head with the wet paper towels.

6. I cut a piece of cardboard paper to glue to the back of the zebra head for support.

7. The next day, once the homemade glue had dried, I bunched up strips of newspaper and taped them to the top of the animal head to create the zebra's mane.

Zebra3.JPG

8. I also rolled up smaller pieces of paper towel to create small rings for the zebra's nostrils and eyelids.

9. I cut small pieces of cardstock paper into triangle-like shapes for the ears and taped them right above the eyes.

Zebra6.JPG

10. Once the ears were taped, I added another layer of paper towels with homemade glue all over the zebra.

11. Once the glue was dry, I found a very old book (a thesaurus) and cut small pieces from its pages. This was done to give the zebra a more artsy black and white look, before painting the stripes. The pieces of paper from the book were Modge Podged throughout the zebra head.

My little helper loved this part of the project, he would dip the sponge brush and lather heavy coats of Modge Podge (eek!)

Zebra8.JPG

12. The printed pieces took about two hours to dry. Once they were done, I started painting the zebra's features. I used black acrylic paint.

13. The stripes were the fun part. They look a bit messy because I couldn't find a better brush but you get the point!. I created random lines and patterns around the eyes and down the neck.

Zebra9.JPG

And here is my final product. It's ready to sit atop of our Christmas Tree:

Zebra10.JPG

It's certainly not a masterpiece but it's a very inexpensive project to complete.
Thanks for reading!

Xo,

-Anabel M.

Anabel Marquez